# 移动端打包
官方文档指引:
- iOS: https://flutter.cn/docs/deployment/ios (opens new window)
- Android:https://flutter.cn/docs/deployment/android (opens new window)
# iOS打包与测试
# 整体流程介绍
- 申请iOS组织账号或者个人开发者账号
- 注册App Store Connect
- 使用XCode打开项目,检查XCode设置
- 更新应用的版本
- 添加启动图标
- 设备签名
- 创建存档
- 使用TestFlight发布测试应用,并测试
- 在AppStore发布应用
# 创建App
首先需要登录appconnect,然后创建”我的App“:

注册App Store Connect
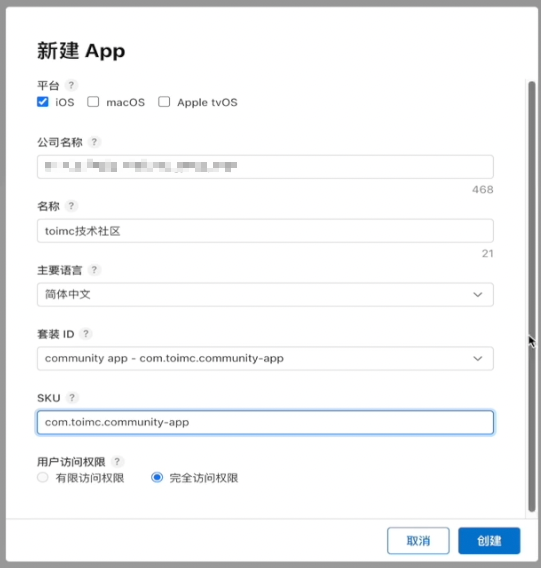
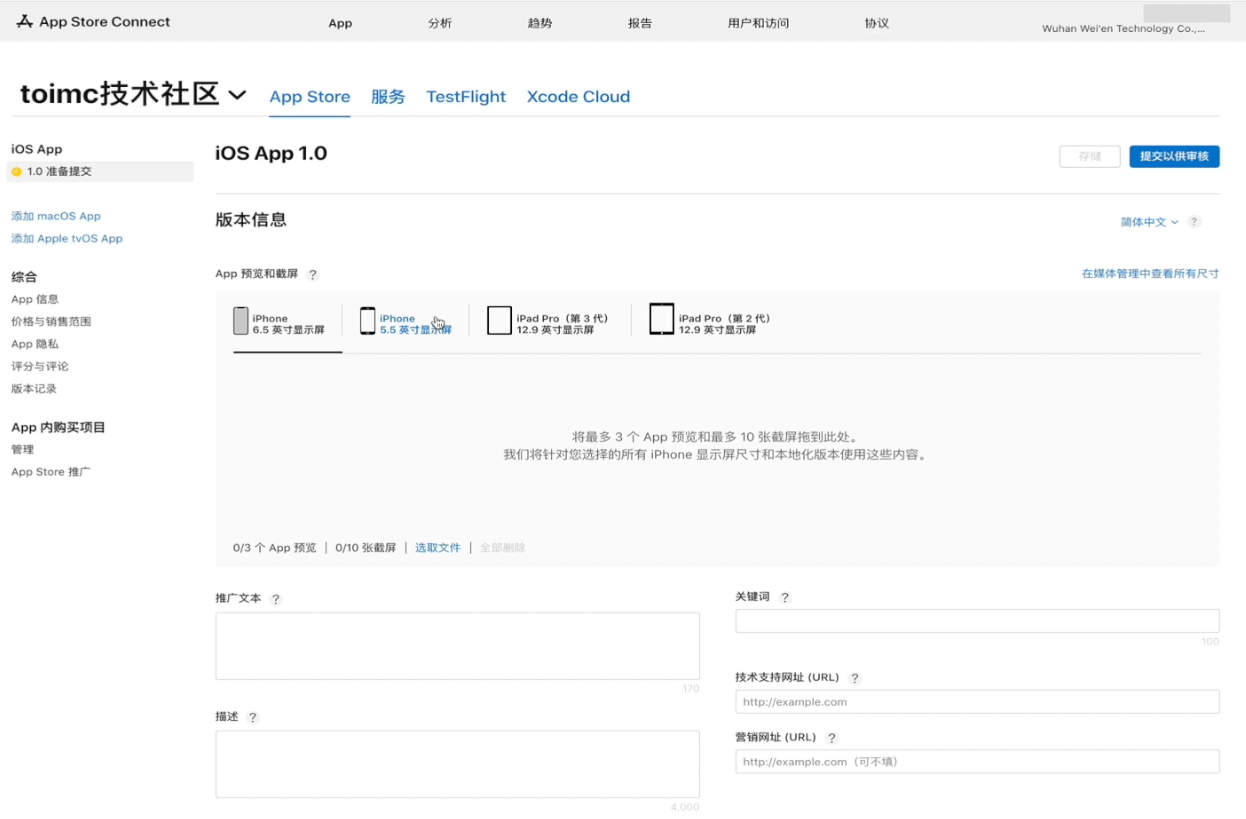
然后填入应用的信息:
# 测试打包
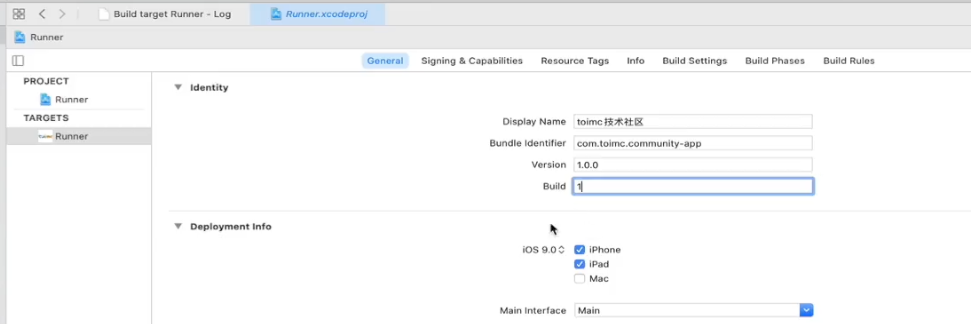
前置的内容中有介绍到如何配置证书,接下来就是配置项目的版本与构建号了。
接下来使用flutter build ios进行打包构建测试一下,如果出现下图,就说明XCode的配置是OK的(证书、Profile配置)。

# 使用Xcode进行Archive
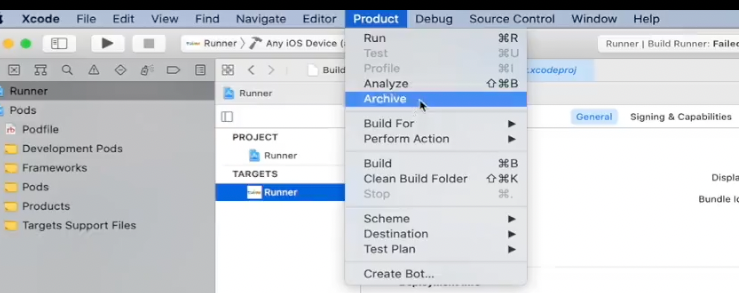
注意:每次构建之前,需要调整Build构建的版本号。如果有新的功能或者bug的修复,需要修改Version版本号,按照语义化的版本号进行调整。
打包完成之后,就可以分发了:

一直下一步,然后就可以上传。
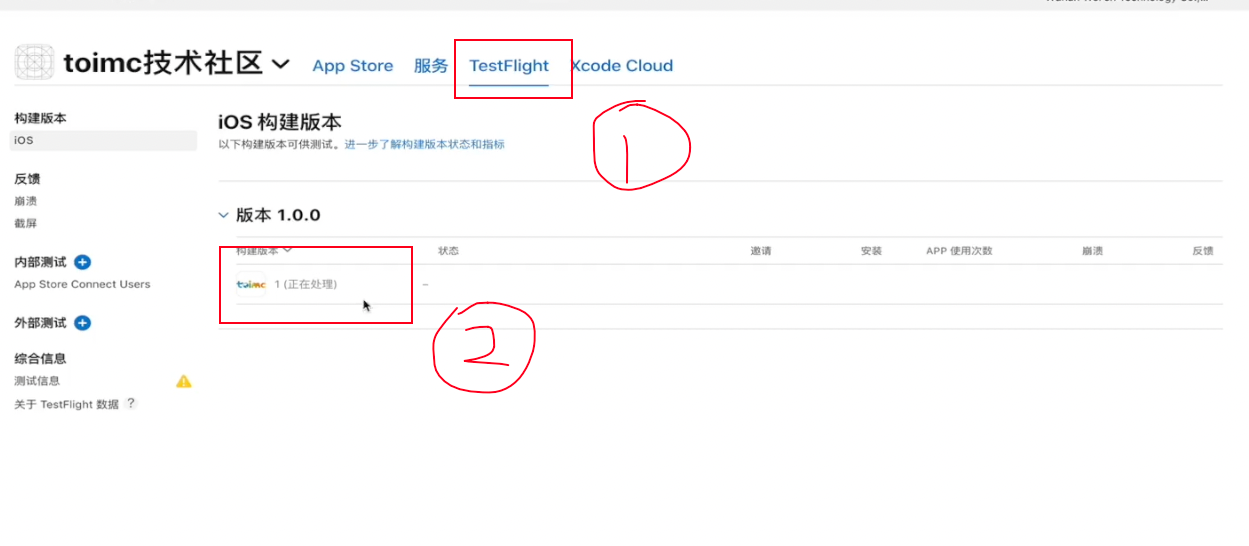
# 使用Testflight服务
Testflight服务分内部测试与外部测试。
- 内部测试:即Appconnect注册的开发者,他们可以优先于外部测试人员收到测试构建完成的通知,并开始测试;
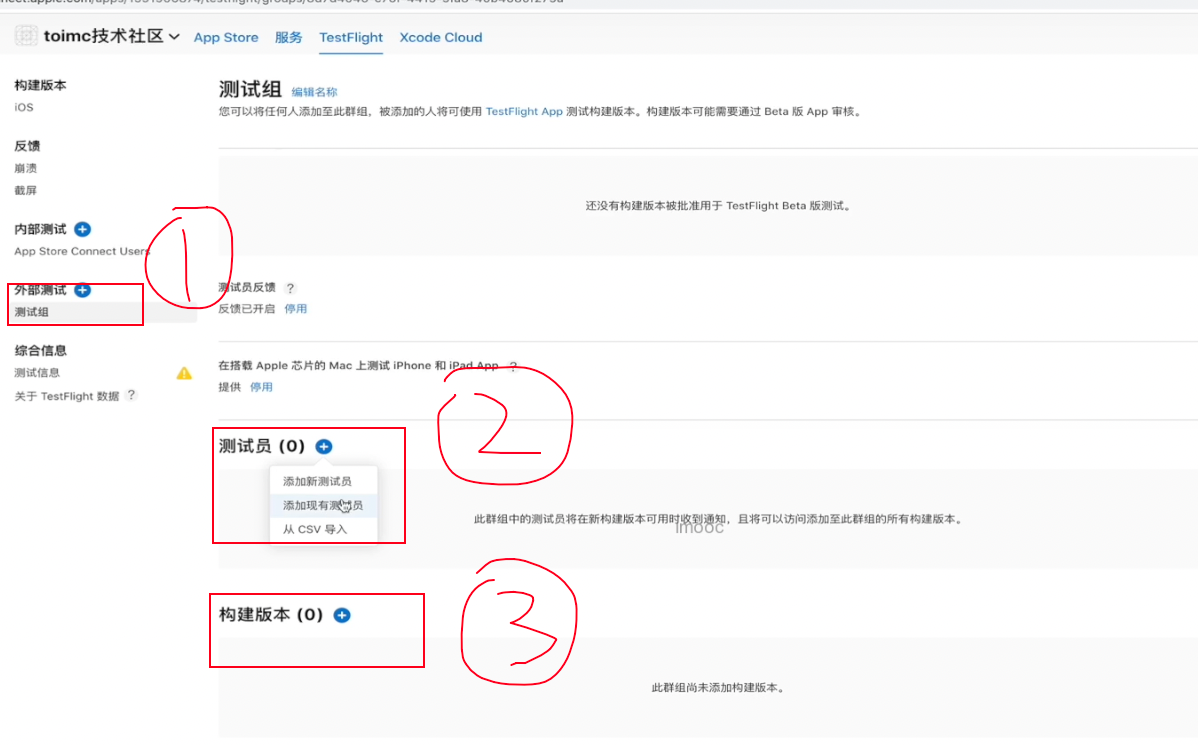
- 外部测试:邀请制,需要下载Testflight进行下载对应的测试应用。
上传成功的App,即可以在Testflight中设置需要开始内部设置的版本,可以添加测试人员。
如果提示缺少合规证明,请选择”否“。
# 提交审核的正式版本
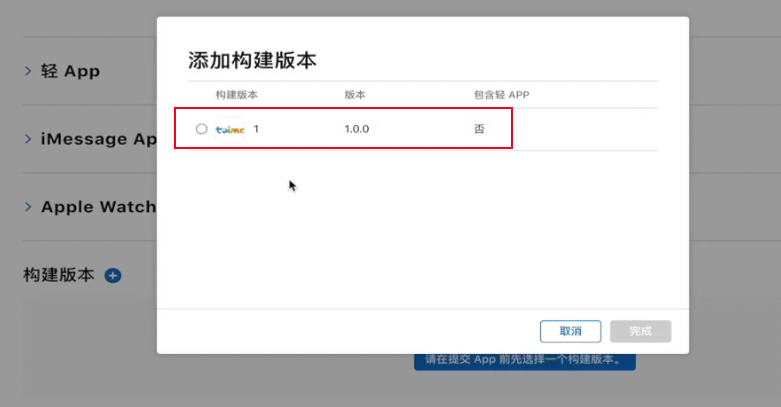
在AppStore的选项卡下,选择构建版本后面的加号:
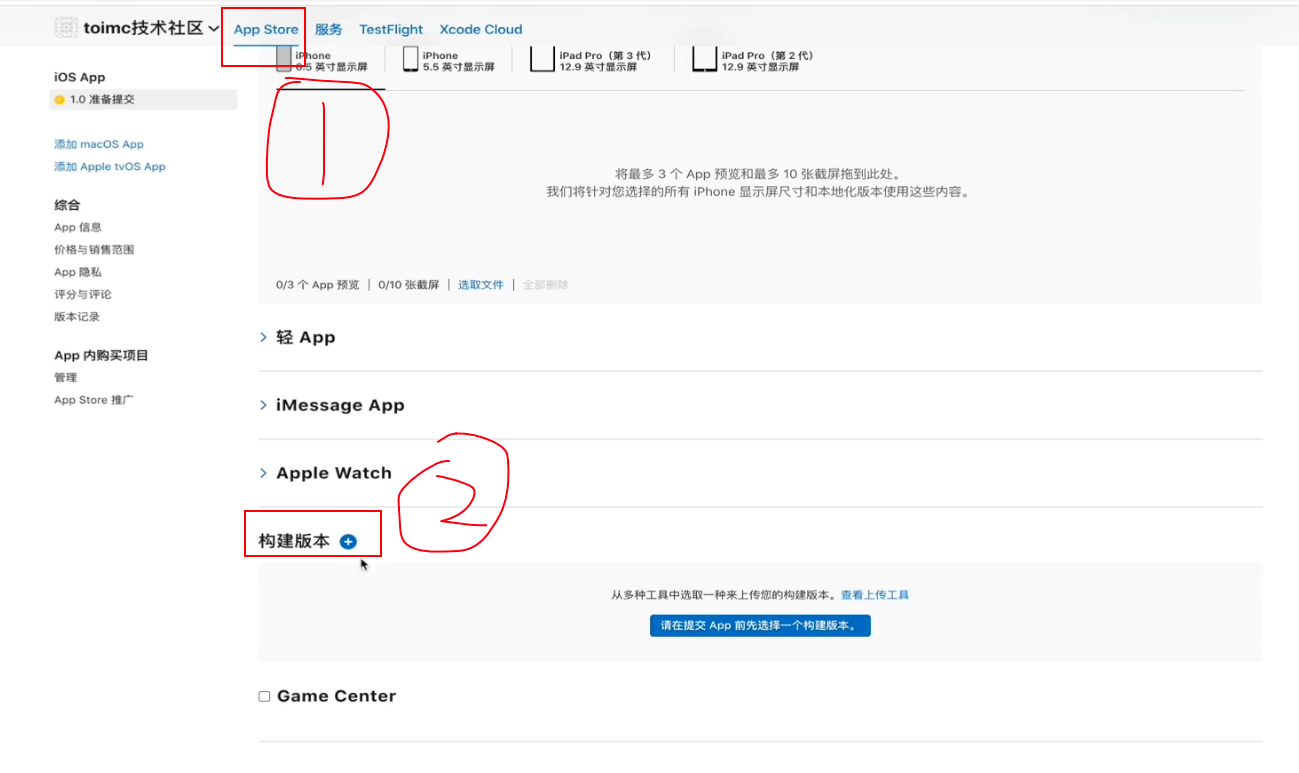
添加需要审核的版本:
# Android打包与测试
# 整体流程介绍
- 申请需要发布的平台的开发者
- 创建密钥库(用于生产发布)
- 更新应用的版本
- 添加启动图标
- 设备签名
- 创建存档
- 应用商店上传对应的构建文件
# 创建密钥库
如果你已经有一个密钥库了,可以直接跳到下一步,如果还没有,需要参考下面的方式创建一个:
在命令行窗口运行如下的命令:
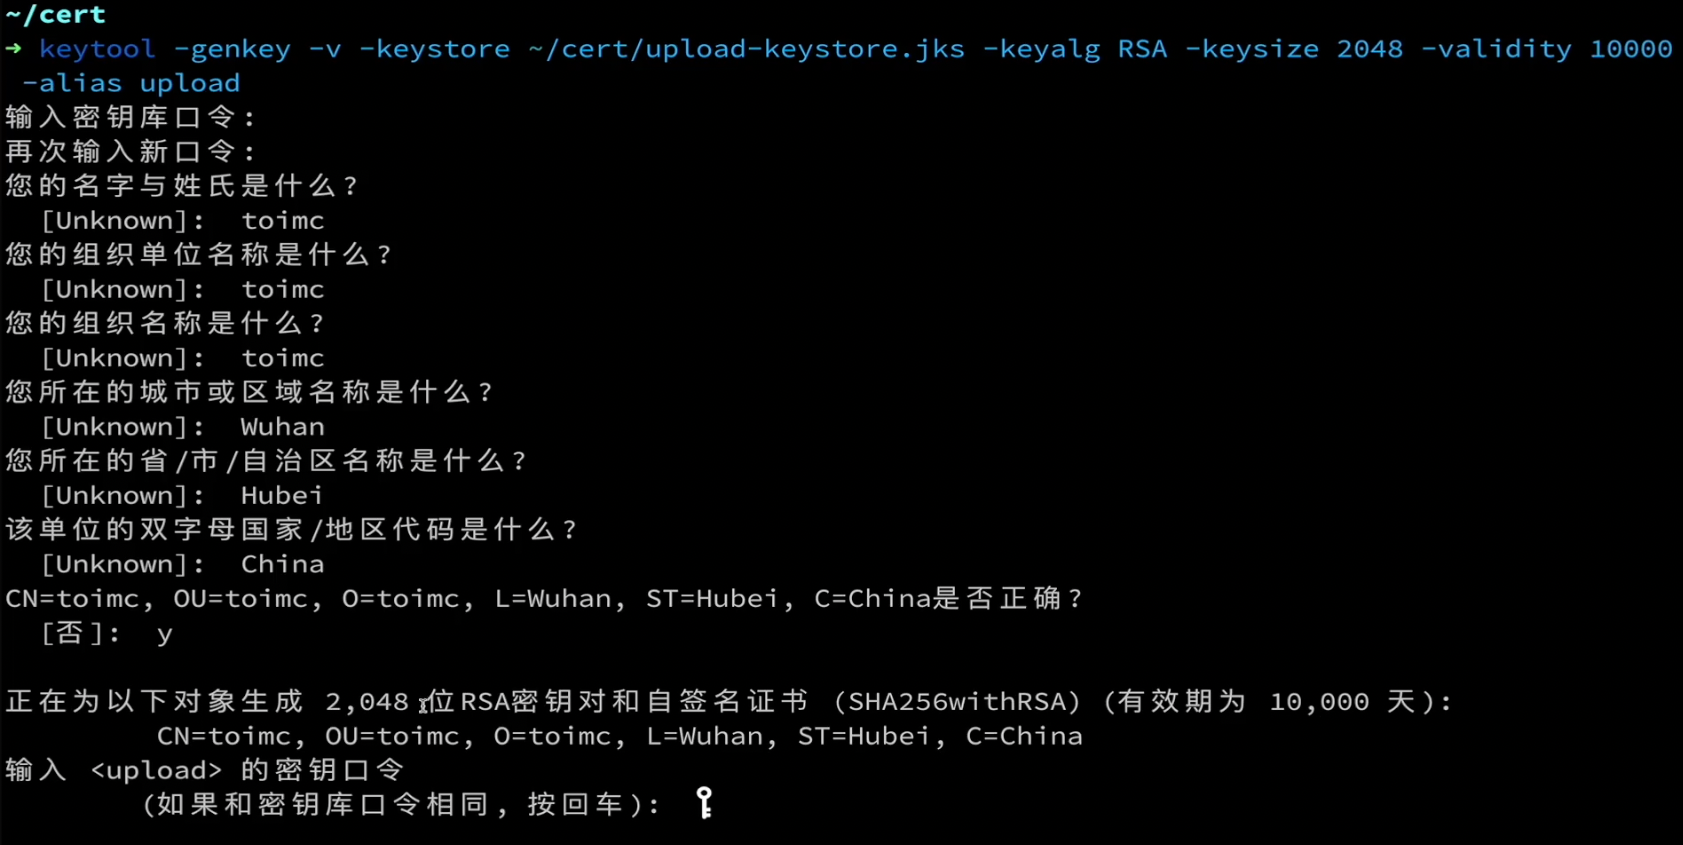
在 macOS 或者 Linux 系统上,执行下面的代码:
keytool -genkey -v -keystore ~/cert/upload-keystore.jks -keyalg RSA -keysize 2048 -validity 10000 -alias upload说明,JKS密钥库使用专用格式,使用命令进行转换:
keytool -importkeystore -srckeystore /Users/macos/cert/upload-keystore.jks -destkeystore /Users/macos/cert/upload-keystore.jks -deststoretype pkcs12在 Windows 系统上,执行下述代码:
keytool -genkey -v -keystore c:\Users\USER_NAME\upload-keystore.jks -storetype JKS -keyalg RSA -keysize 2048 -validity 10000 -alias upload该命令将会把
upload-keystore.jks文件储存在你的主文件夹中。如果你想要储存在其他地方,请通过指定-keystore传入参数。 注意,请保证这个文件的私有性,不要将它提交到公共的代码管理空间。提示
keytool可能不在我们的系统路径中。它是 Java 的一部分,在安装 Android Studio 的时候会被一起安装。运行flutter doctor -v,’Java binary at:’ 之后打印出来的就是它的路径,然后用java来替换以上命令中的keytool,并加上keytool的完整路径即可。如果文件路径包含空格,类似Program Files这样的,请使用平台允许的命名规则。例如,在 Mac/Linux 上使用Program\ Files,而在 Windows 上可以使用"Program Files"。- 只有 Java 9 或更高版本才需要
-storetype JKS标签。从 Java 9 版本开始,keystore 类型默认为 PKS12。
创建过程示例:
# 密钥配置文件
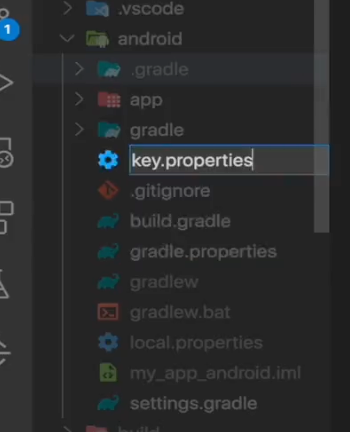
文件信息:
storePassword=toimc12345
keyPassword=toimc12345
keyAlias=upload
storeFile=/Users/macos/cert/upload-keystore.jks
注意:
storeFile需要使用绝对路径。
# 修改build.gradle配置
文件android/app/build.gralde:
def localProperties = new Properties()
def localPropertiesFile = rootProject.file('local.properties')
if (localPropertiesFile.exists()) {
    localPropertiesFile.withReader('UTF-8') { reader ->
        localProperties.load(reader)
    }
}

def flutterRoot = localProperties.getProperty('flutter.sdk')
if (flutterRoot == null) {
    throw new GradleException('Flutter SDK not found. Define location with flutter.sdk in the local.properties file.')
}

def flutterVersionCode = localProperties.getProperty('flutter.versionCode')
if (flutterVersionCode == null) {
    flutterVersionCode = '1'
}

def flutterVersionName = localProperties.getProperty('flutter.versionName')
if (flutterVersionName == null) {
    flutterVersionName = '1.0'
}

apply plugin: 'com.android.application'
apply plugin: 'kotlin-android'
apply from: "$flutterRoot/packages/flutter_tools/gradle/flutter.gradle"

def keystoreProperties = new Properties()
def keystorePropertiesFile = rootProject.file('key.properties')
if (keystorePropertiesFile.exists()) {
    keystoreProperties.load(new FileInputStream(keystorePropertiesFile))
}

android {
    compileSdkVersion 30

    sourceSets {
        main.java.srcDirs += 'src/main/kotlin'
    }

    lintOptions {
        //如打包出现Failed to transform libs.jar to match attributes
        checkReleaseBuilds false
    }

    defaultConfig {
        // TODO: Specify your own unique Application ID (https://developer.android.com/studio/build/application-id.html).
        applicationId 'com.toimc.community_app'
        minSdkVersion 16
        targetSdkVersion 30
        versionCode flutterVersionCode.toInteger()
        versionName flutterVersionName
        ndk {
            //设置支持的SO库架构
            abiFilters 'armeabi-v7a', 'arm64-v8a', 'x86', 'x86_64'
        }
    }

    signingConfigs {
        release {
            keyAlias keystoreProperties['keyAlias']
            keyPassword keystoreProperties['keyPassword']
            storeFile keystoreProperties['storeFile'] ? file(keystoreProperties['storeFile']) : null
            storePassword keystoreProperties['storePassword']
        }
    }
    buildTypes {
        release {
            signingConfig signingConfigs.release
        }
    }
}

flutter {
    source '../..'
}

dependencies {
    implementation "org.jetbrains.kotlin:kotlin-stdlib-jdk7:$kotlin_version"
}
然后使用flutter clean清除缓存。
# 修改构建版本与构建号
找到pubspec.yaml文件:
# The following defines the version and build number for your application.
# A version number is three numbers separated by dots, like 1.2.43
# followed by an optional build number separated by a +.
# Both the version and the builder number may be overridden in flutter
# build by specifying --build-name and --build-number, respectively.
# In Android, build-name is used as versionName while build-number used as versionCode.
# Read more about Android versioning at https://developer.android.com/studio/publish/versioning
# In iOS, build-name is used as CFBundleShortVersionString while build-number used as CFBundleVersion.
# Read more about iOS versioning at
# https://developer.apple.com/library/archive/documentation/General/Reference/InfoPlistKeyReference/Articles/CoreFoundationKeys.html
version: 1.0.0+1
# 打包构建
加入混淆
flutter build apk --obfuscate --splite-debug-info=./debug/ --release
构建成功:
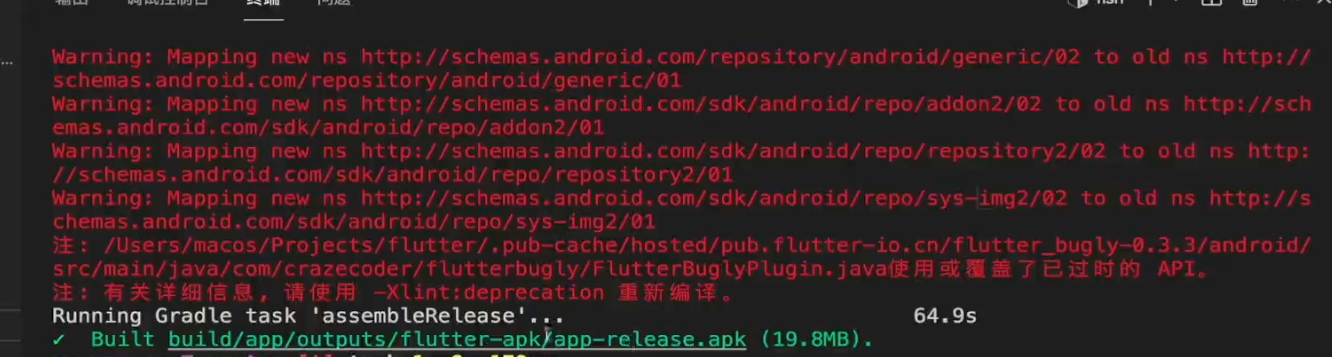
有很多warnings,是由于bugly的flutter库使用了很多过时的API。